

You have received your Ubigi eSIM profile (QR Code) by email and now want to install it on your Android device, follow our step-by-step installation guide below:
1 – Open your camera and scan the QR code you previously received by email: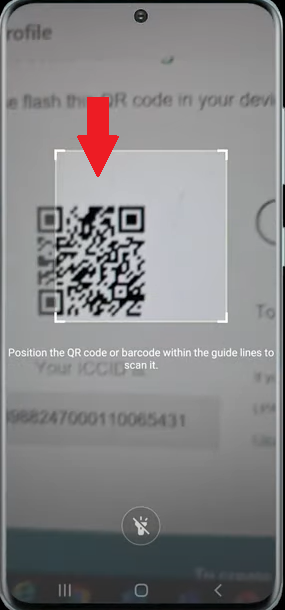
2 – A pop up will appear, tap on it and tap on “Add” :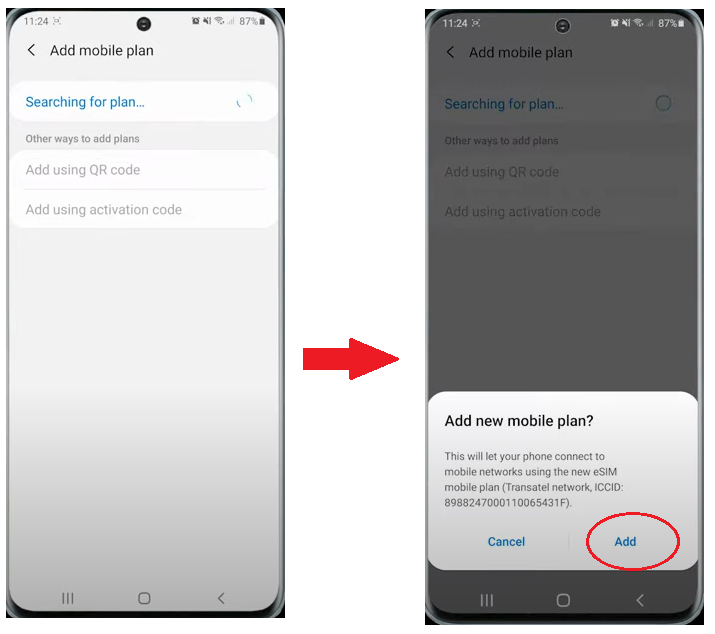
3 – A second pop up will appear, tap on OK: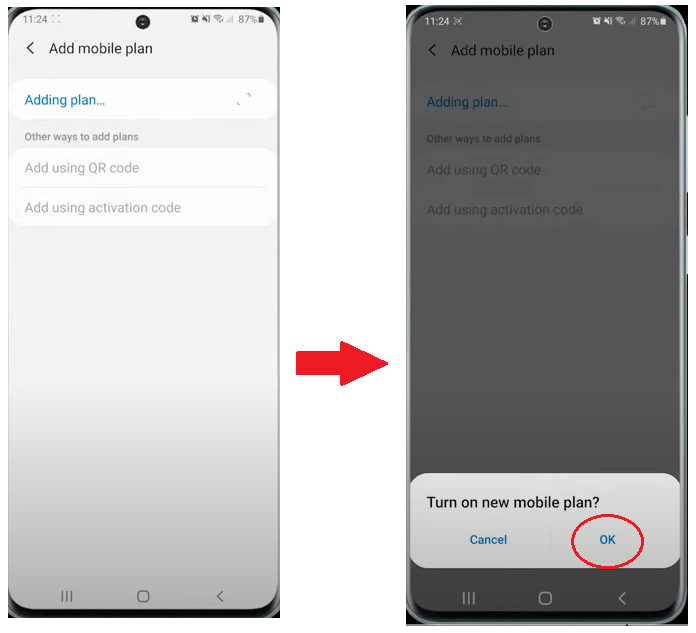
4 – Your Ubigi eSIM profile will be displayed in your eSIMs list: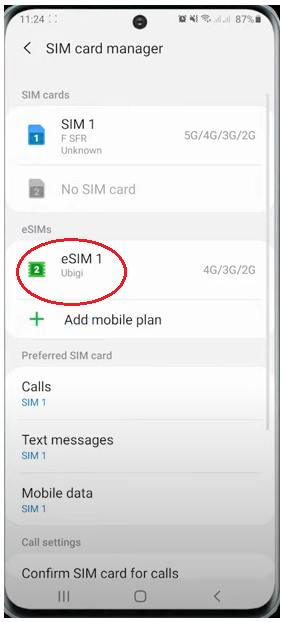
5 – Now let’s rename this new eSIM profile to be able to identify it easily: tap on it, select “Name”, rename it as Ubigi & click on OK to make it appear on screen: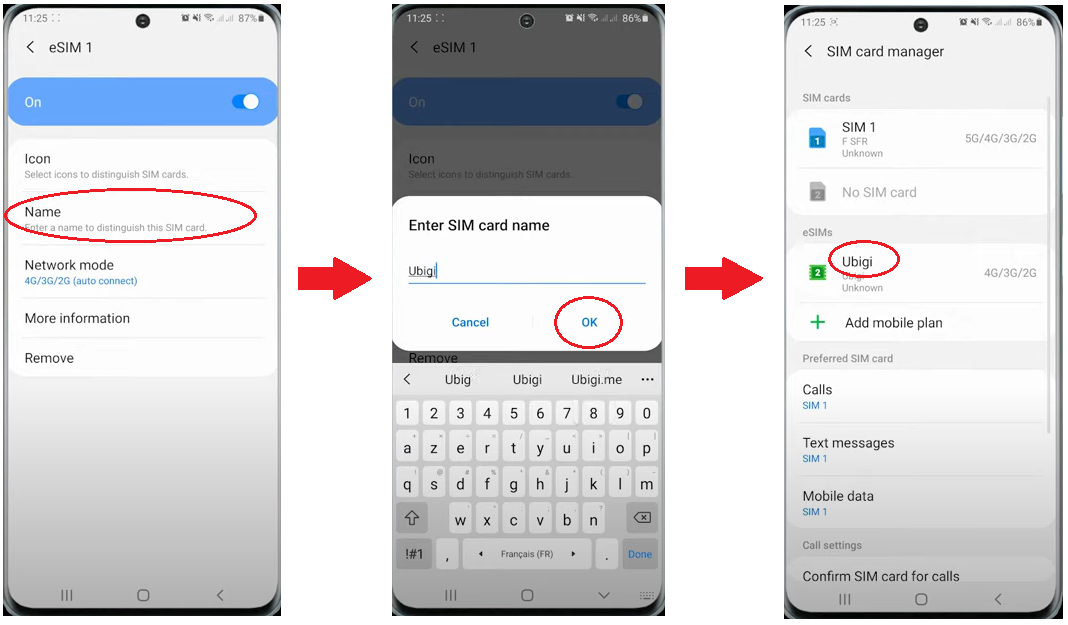
6 – Now let’s define your Ubigi eSIM as your default line for mobile data: click on Mobile data in the preferred SIM card list and choose Ubigi as preferred: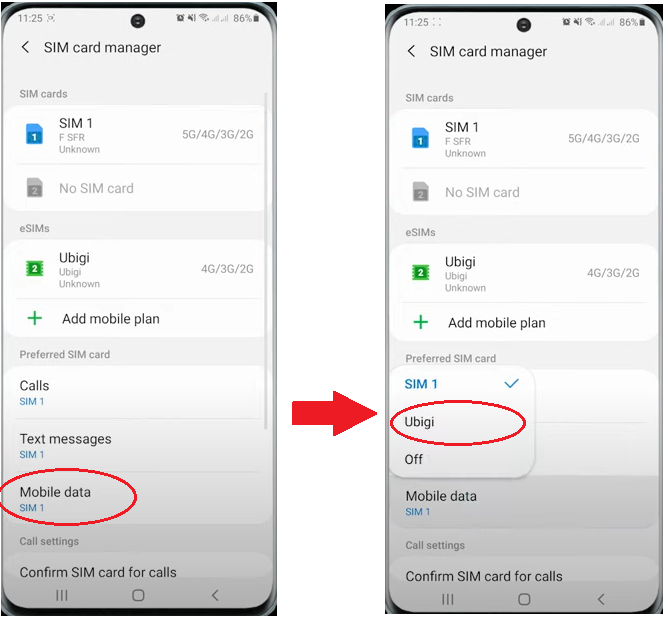
7 – A pop up will appear, tap on “Change” and you will get a confirmation that it is done: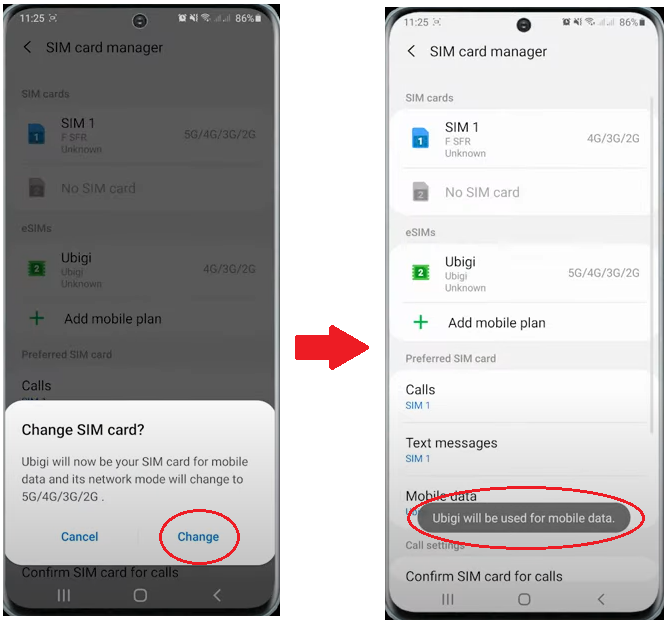
8 – Go back in the Connections menu and click on Mobile Networks, then activate Data roaming: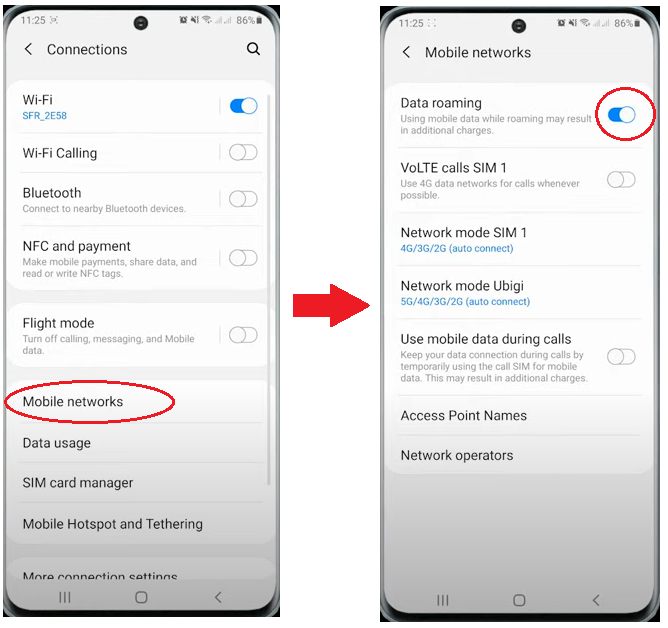
9 – You need now to create an Access Point Name to finalize the configuration of your Ubigi data connection: select Access Point Names and click on Ubigi on the bottom right of your screen: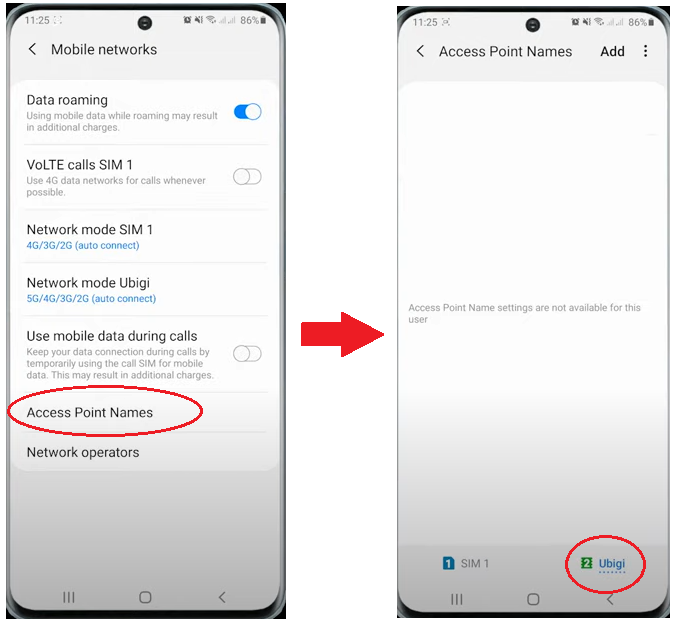
10 – Click on Add at the top to create a new APN with the following information:
– Name: Ubigi
– APN: mbb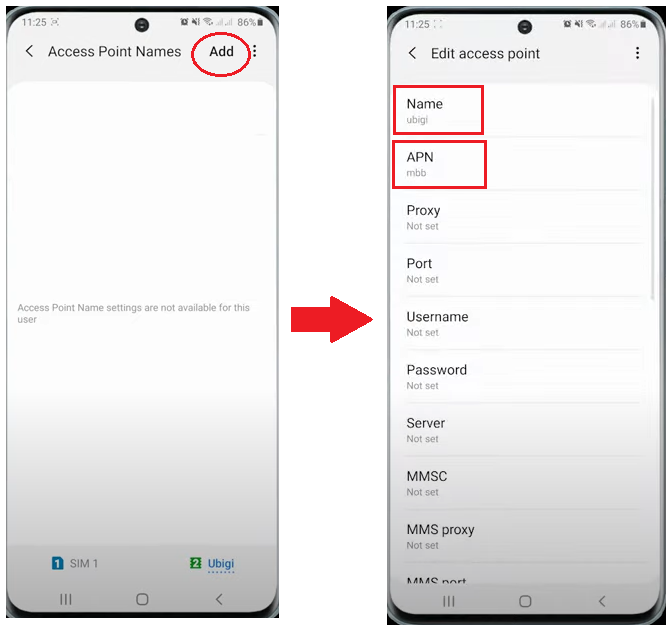
11 – Click on the 3 dots at the top right-hand corner and SAVE, then select this new APN: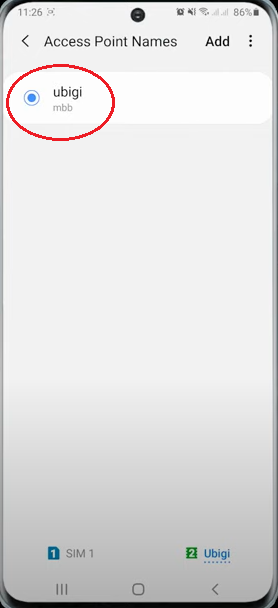
12 – Then disable your WiFi in the Connections menu: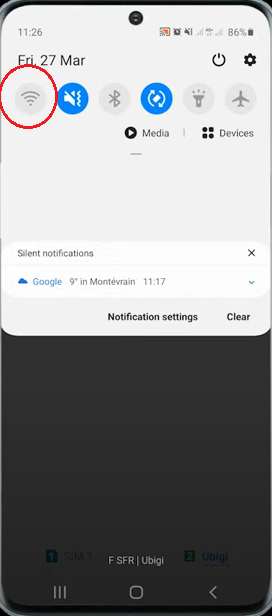
13 – Now go to Ubigi.me in your web browser (or open the Ubigi app). You’ll arrive automatically on the account creation page: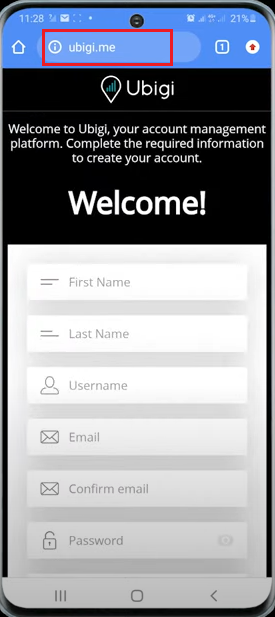
You can now create your account and buy your first data plan.
Enjoy now your Ubigi connectivity on your Android device!