

To install your Ubigi eSIM on your Android device, discover our step-by-step installation guide.
Or follow the instructions below:
1 – Press and hold the QR code you previously received by email if your device allows it or scan it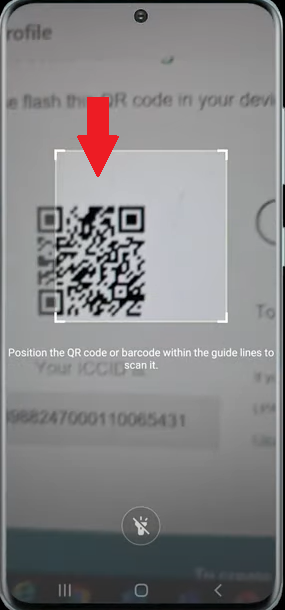
2 – A pop up will appear, tap on it and tap on “Add” :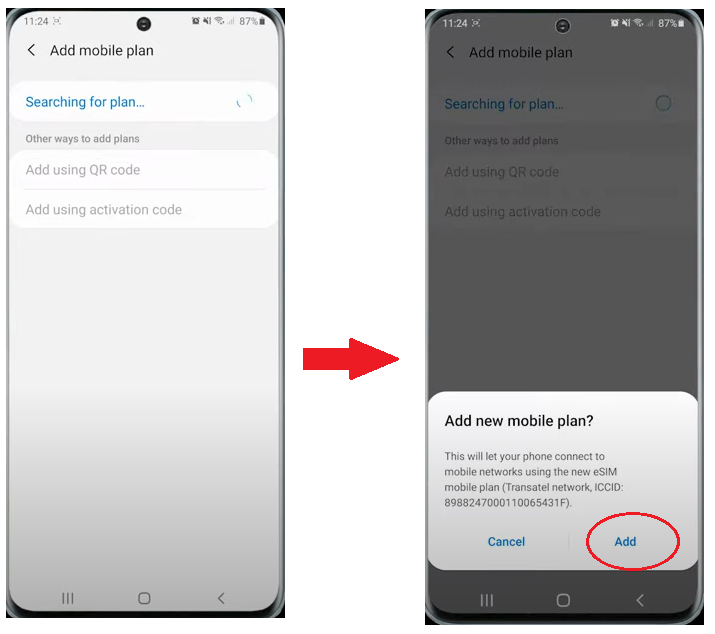
3 – A second pop up will appear, tap on OK: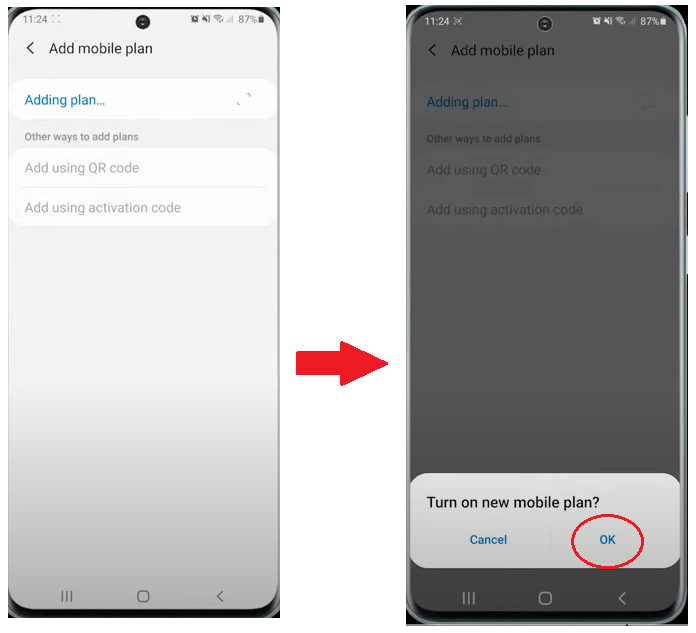
4 – Your Ubigi eSIM profile will be displayed in your eSIMs list: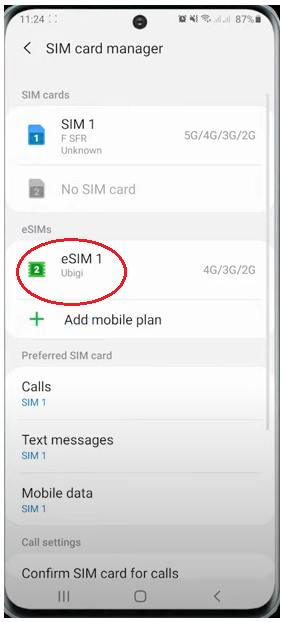
5 – Now let’s rename this new eSIM profile to be able to identify it easily: tap on it, select “Name”, rename it as Ubigi & click on OK to make it appear on screen: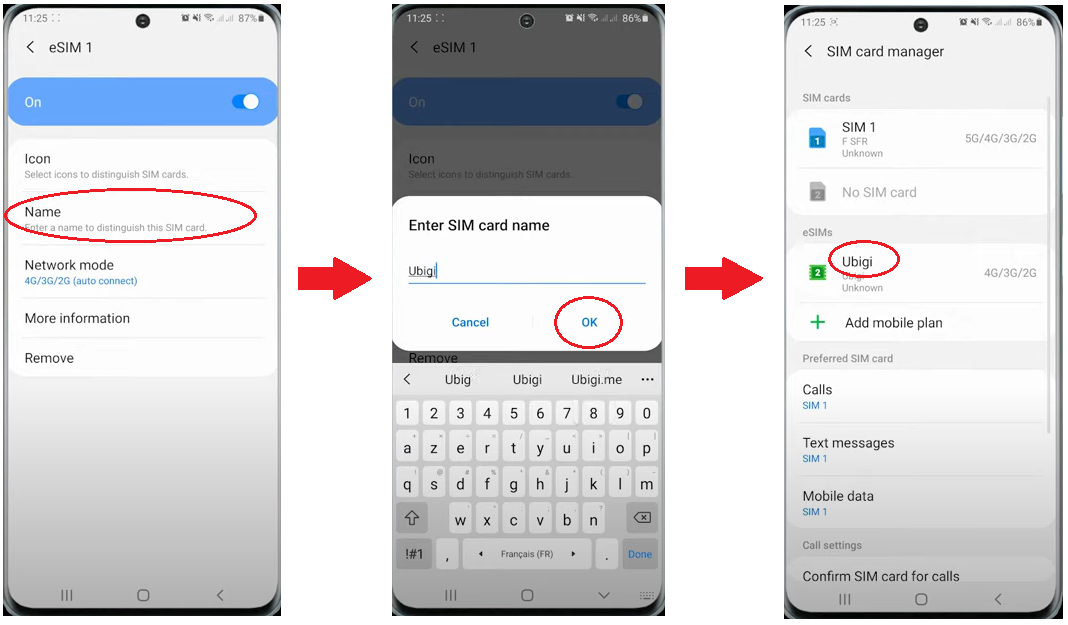
6 – Now let’s define your Ubigi eSIM as your default line for mobile data: click on Mobile data in the preferred SIM card list and choose Ubigi as preferred: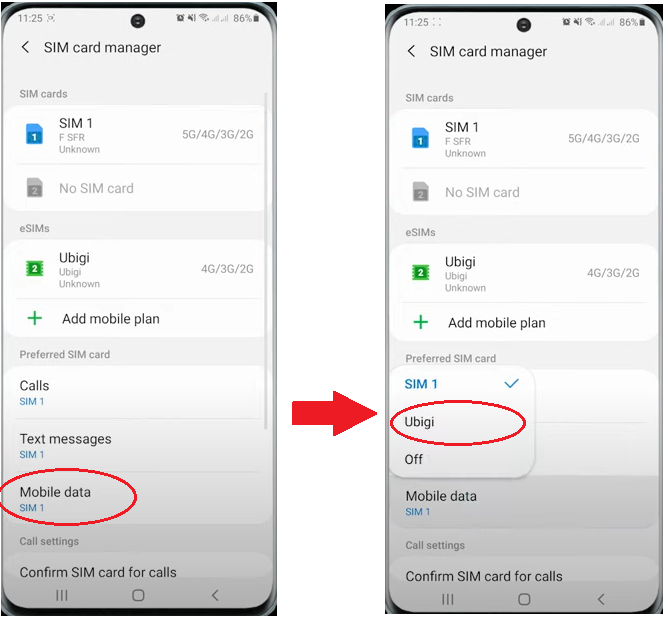
7 – A pop up will appear, tap on “Change” and you will get a confirmation that it is done: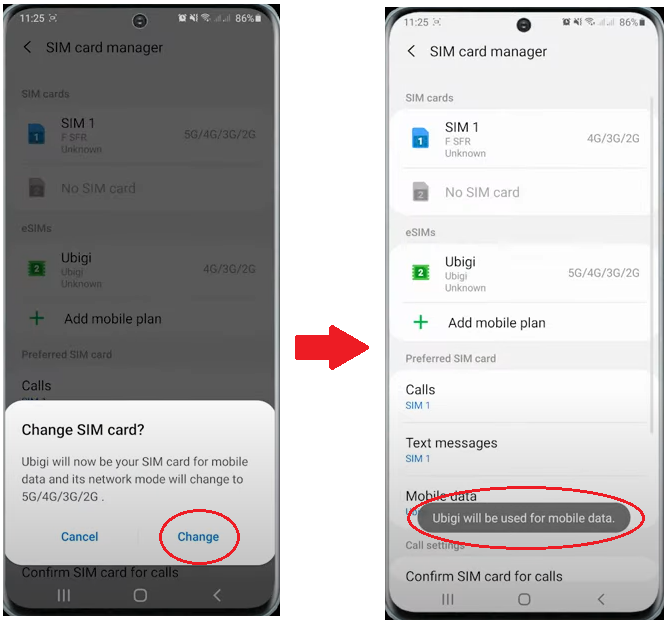
8 – Go back in the Connections menu and click on Mobile Networks, then activate Data roaming: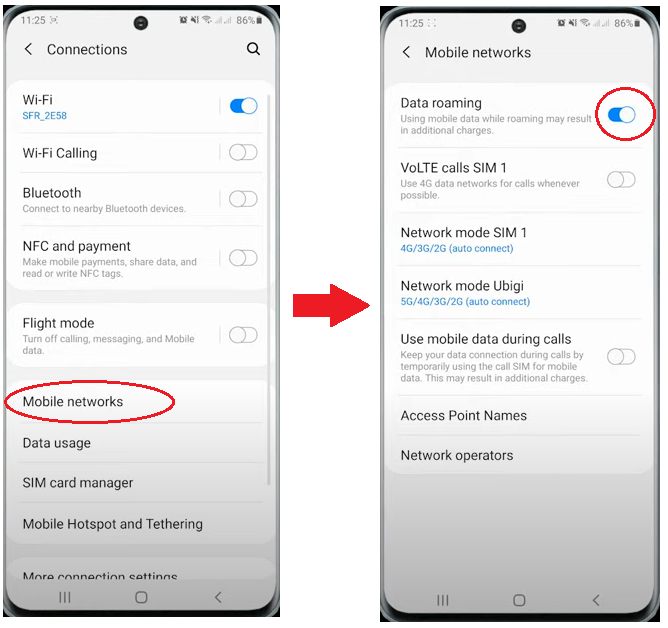
9 – You need now to create an Access Point Name to finalize the configuration of your Ubigi data connection: select Access Point Names and click on Ubigi on the bottom right of your screen: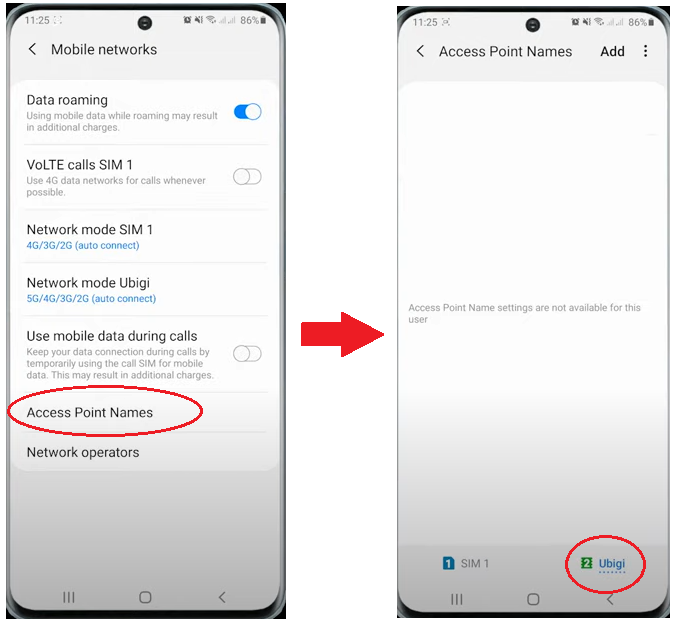
10 – Click on Add at the top to create a new APN with the following information:
– Name: Ubigi
– APN: mbb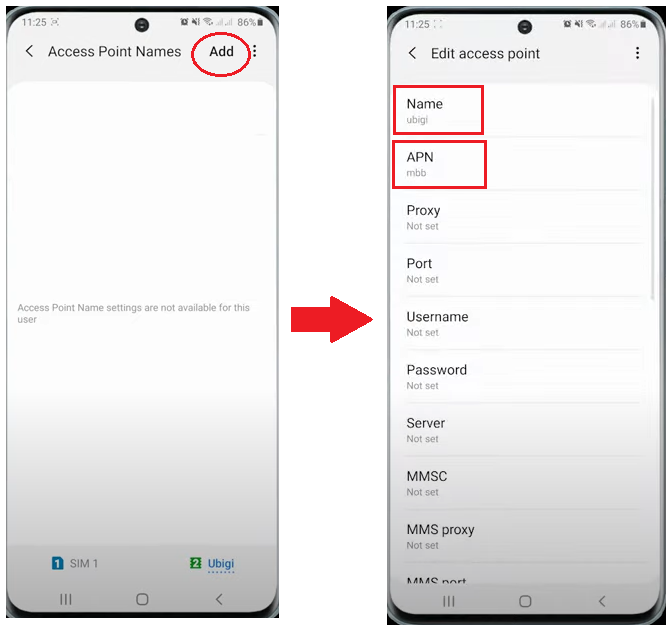
11 – Click on the 3 dots at the top right-hand corner and SAVE, then select this new APN: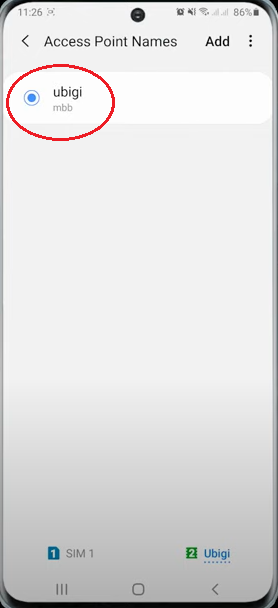
12 – Then disable your WiFi in the Connections menu: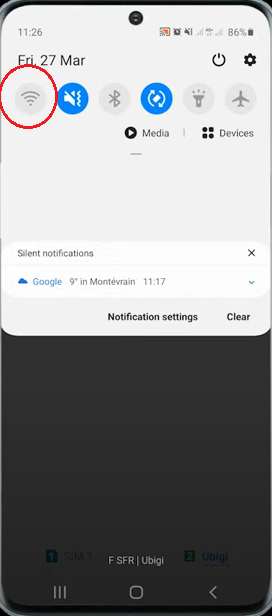
13 -Click on the sign up button in the email to create your account and link your eSIM to it.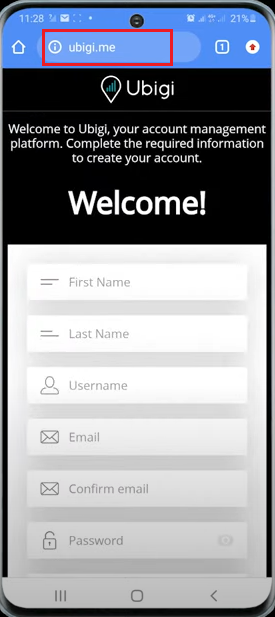
You can now create your account and buy your first data plan.
Enjoy now your Ubigi connectivity on your Android device!