Normally, you do not need to set the configuration for the APN as it is done automatically when you download the eSIM profile.
If your Internet connection does not work, we invite you to check the two following sections :
– How do I know if my Ubigi eSIM profile is activated on my Windows 10 or Windows 11 device?
– My Ubigi eSIM profile is activated on my Windows 10 or Windows 11 device but I do not have a network, what should I do?
After that, if the situation stills persists and the connection still does not work while you are located in a country eligible to Ubigi services, we invite you to follow instructions below to set the APN configuration manually on your device. To do that:
For Windows 10 (NB: instructions for Windows 11 at the bottom of this page):
– Go to Settings :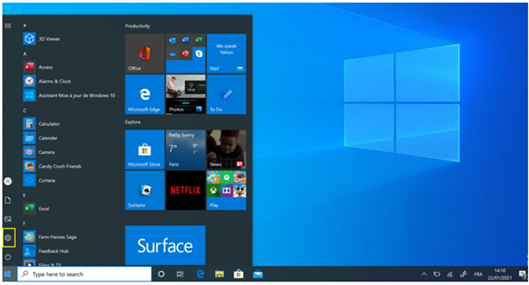
– Then, choose Networks and Internet:
– Choose Cellular, then Advanced Options: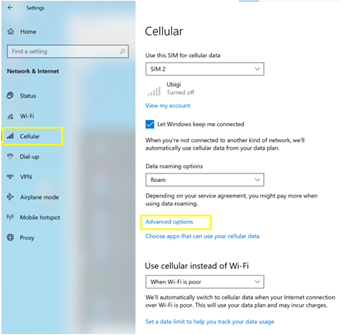
– Then press “+ Add APN” to create a new APN: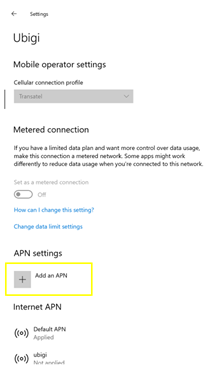
– Fill in the following fields:
Profile name: Ubigi
APN: mbb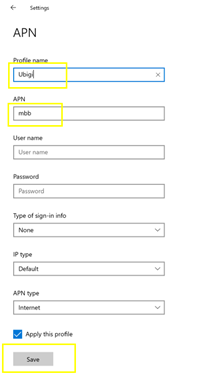
– Finally, click on SAVE.
You can now access the Internet through the connectivity of your Ubigi eSIM profile.
For Windows 11:
– Press the Windows key to access the main menu and go to Settings :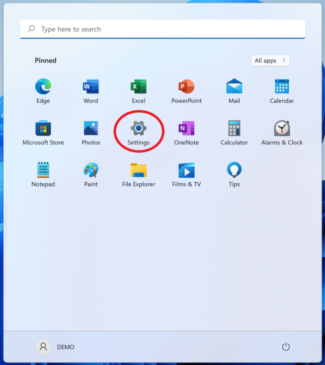
– Then, choose Networks and Internet and click on Mobile: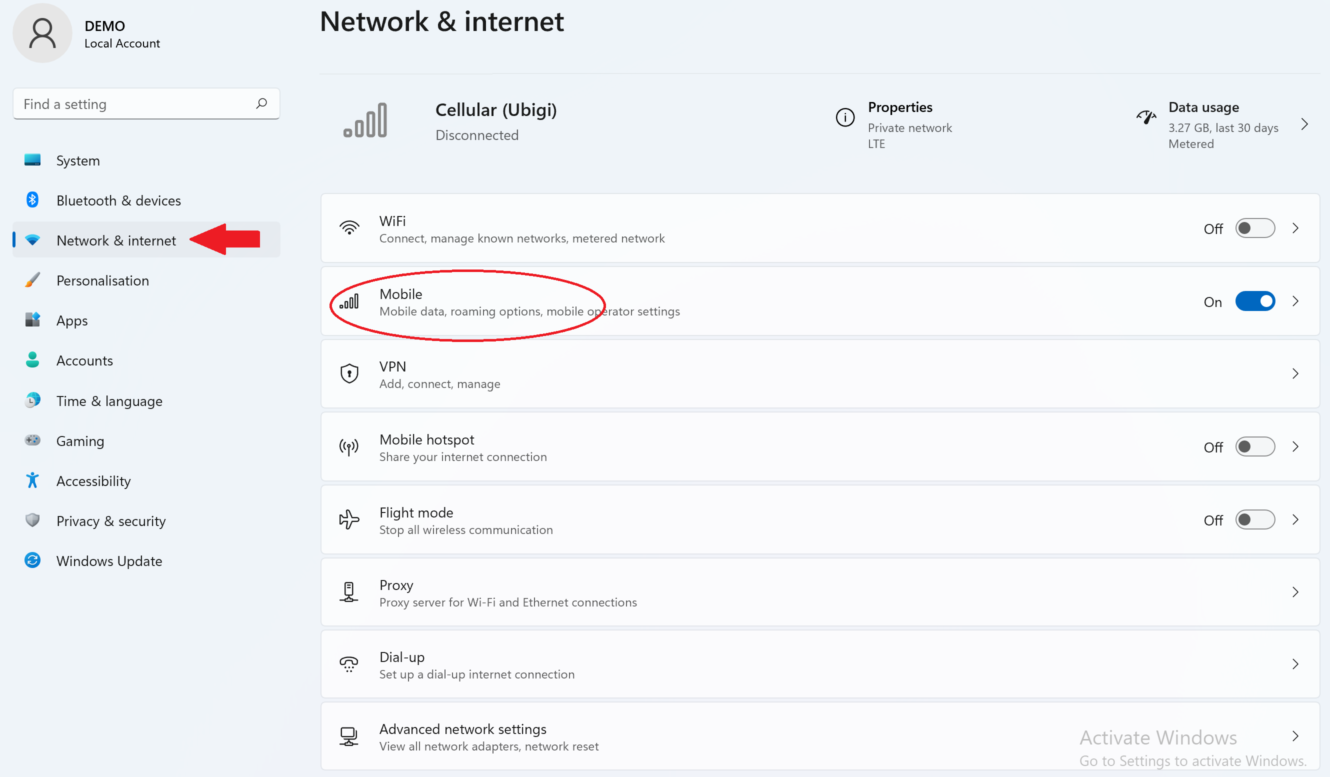
– Access Mobile operator settings: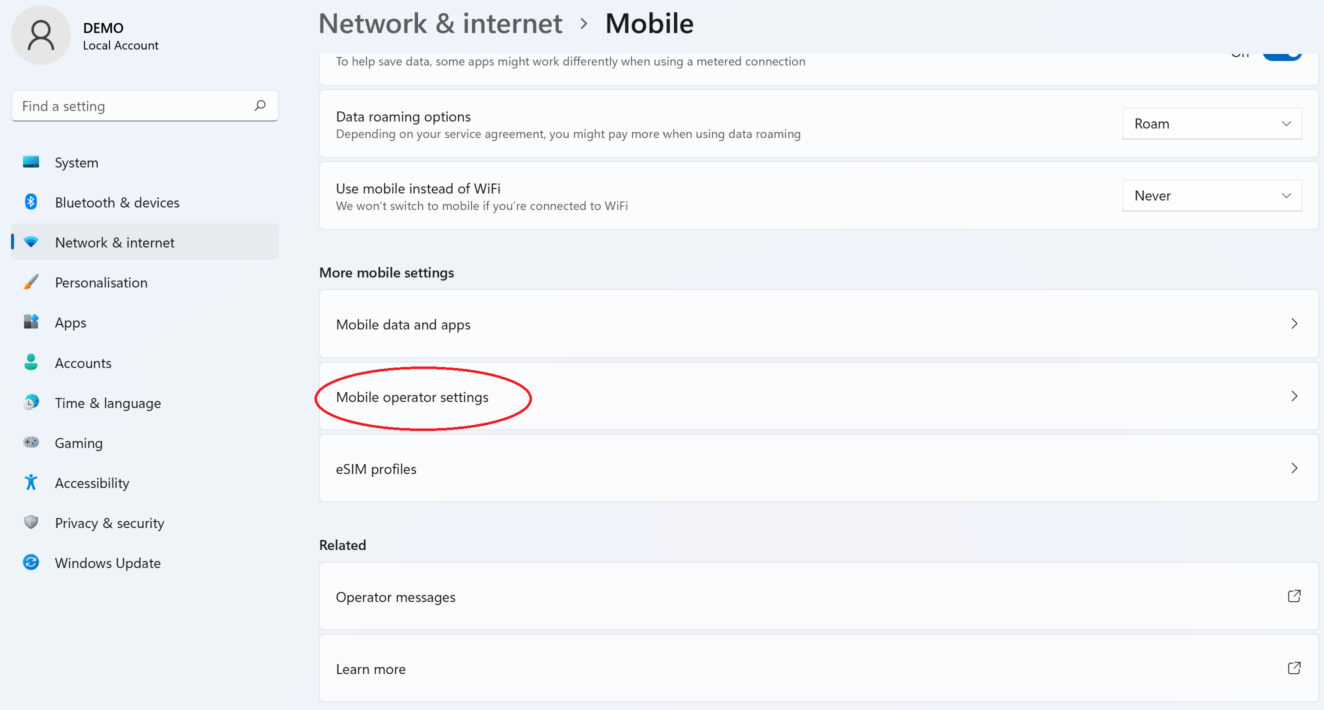
– Then press “+ Add APN” to create a new APN: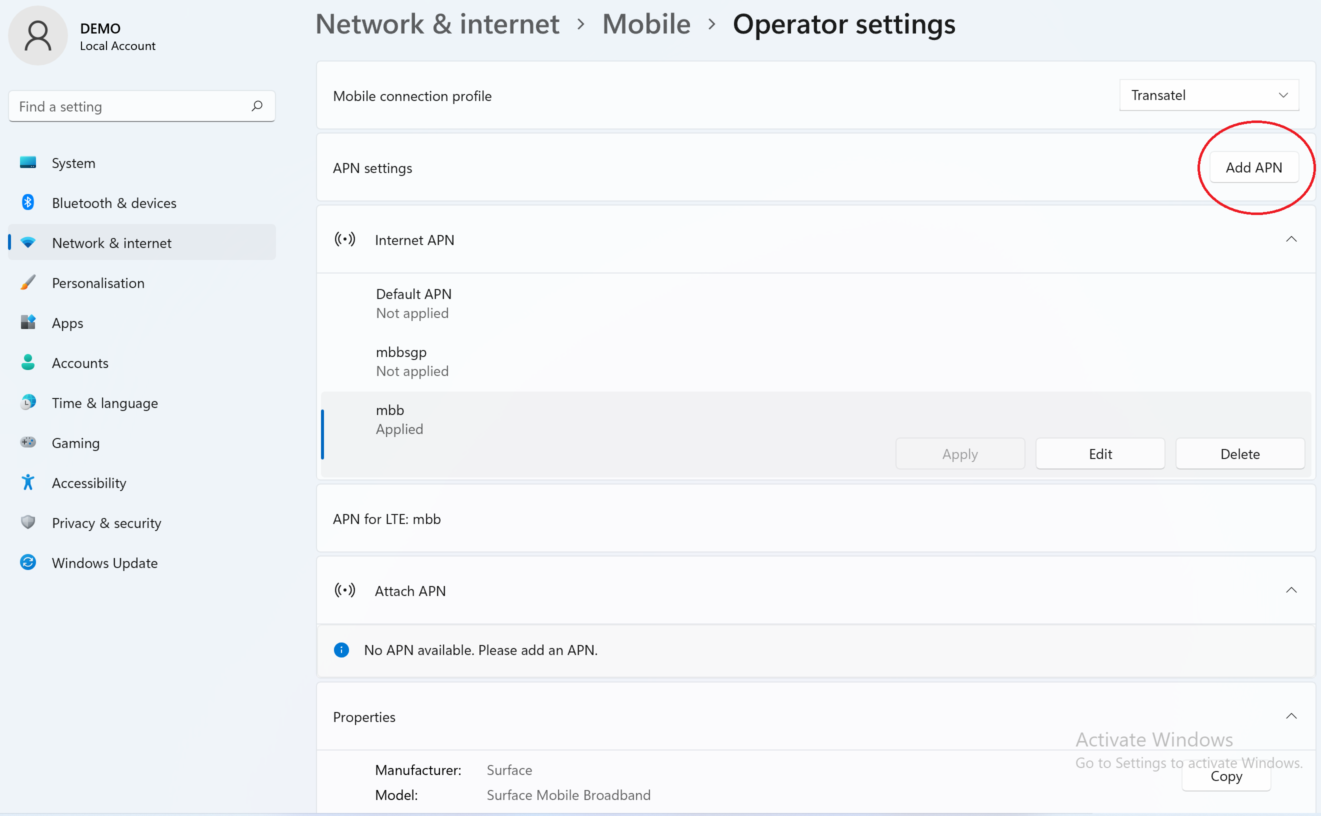
-Fill in the following fields:
Profile name: Ubigi
APN: mbb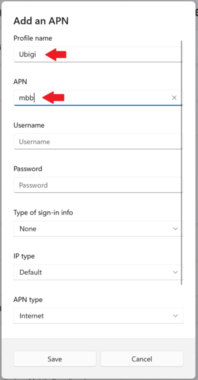
– Finally, click on SAVE.
You can now access the Internet through the connectivity of your Ubigi eSIM profile.
Note: If you are using a VPN on your device, it is recommended that you disable it in case you are having trouble connecting to Ubigi services.

