When you do not have a network with your Ubigi eSIM profile, follow the instructions below to select a network manually on your device:
– First ensure that the Mobile network option is activated on the “Network & Internet settings” on the flyout and deactivate the WiFi option:
Windows 10: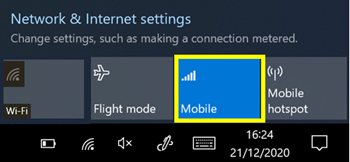
Windows 11: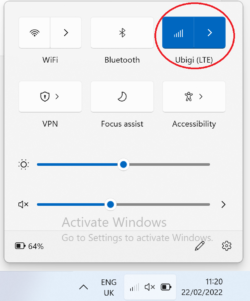
If it was already activated, deactivate it for few seconds then reactivate it.
– Then, tap on the Windows button to display the main menu and go to Settings
– Select ‘Networks and Internet’:
– Then Select ‘Cellular’ or ‘Mobile”
For Windows 10 (NB: instructions for Windows 11 at the bottom of this page):
– Select ‘Advanced Options’: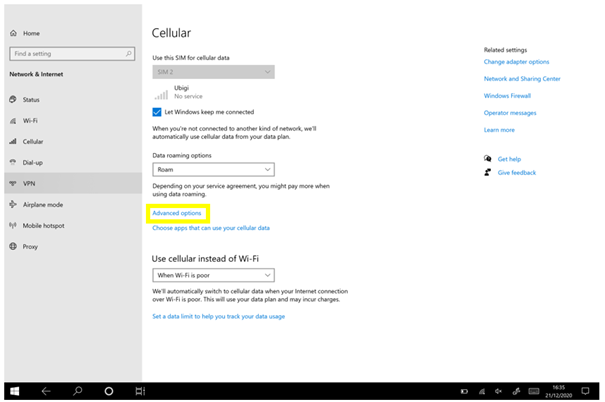
– After that, scroll down the screen and select ‘Search for networks’: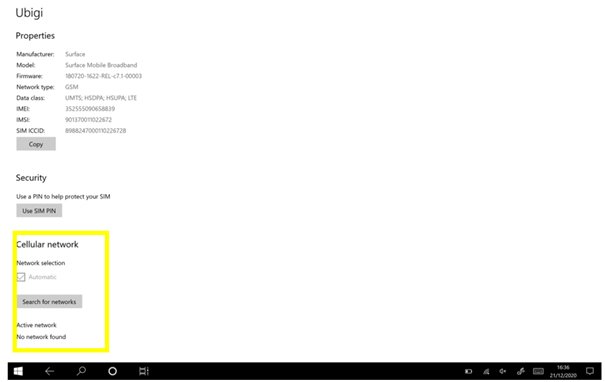
– The network search will appear as in progress: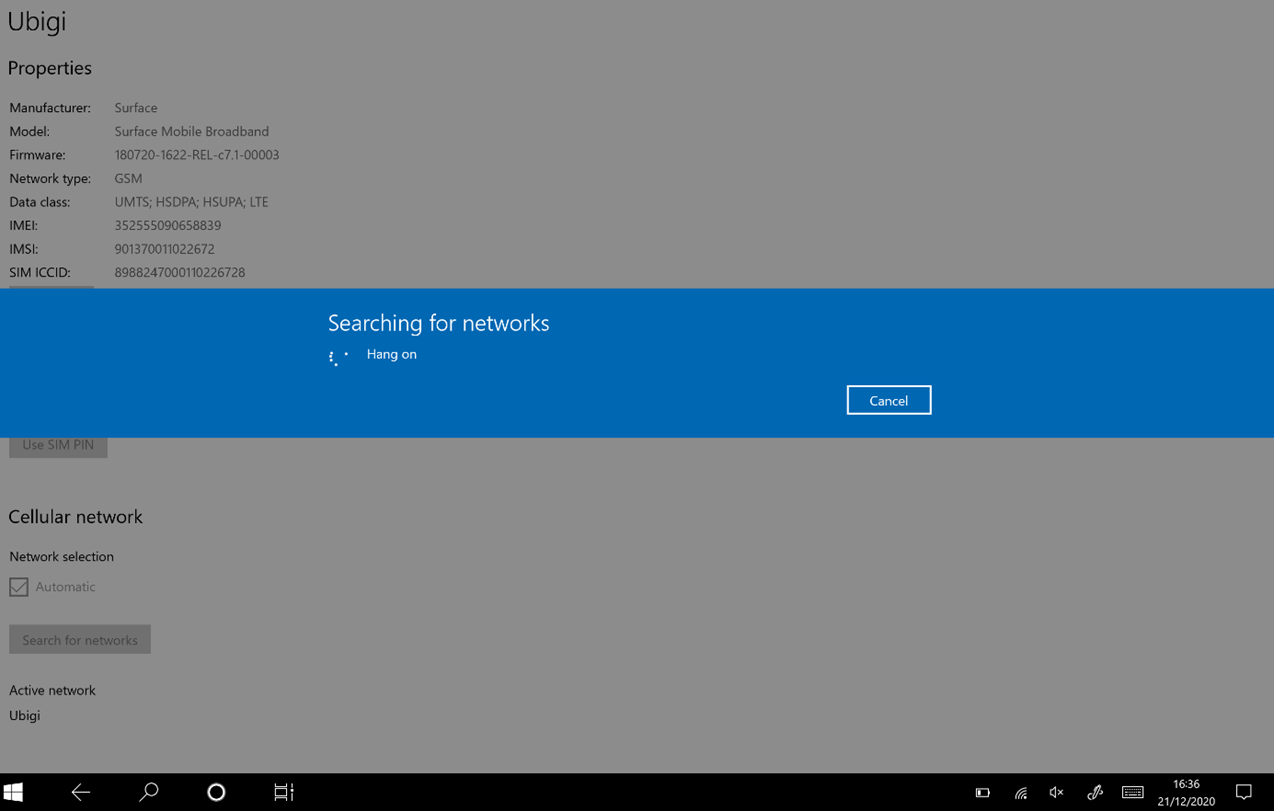
– Select the Ubigi network if it appears: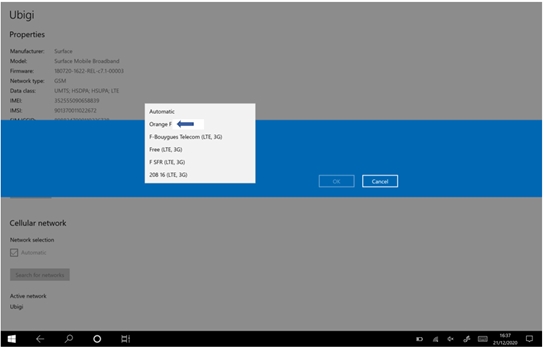
Note: You will see Ubigi appear or the name of our telecom partner in the country in which you are located – check the list of our telecom partners by country in order to select the correct network.
– Finally, press OK to confirm the selected network: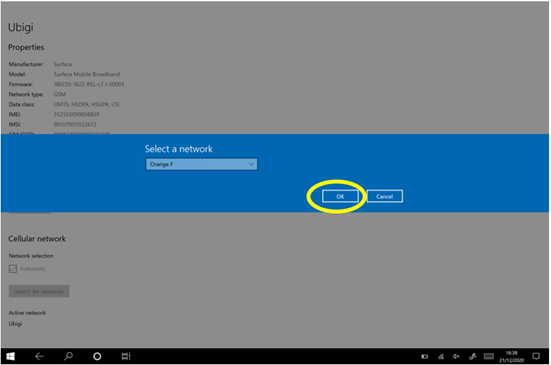
After few seconds, the network will be displayed and you will be able to use your Ubigi connectivity from your device.
[Note: If you are using a VPN on your device, it is recommended that you disable it in case you are having trouble connecting to Ubigi services.]
For Windows 11:
– On ‘Mobile network’, put the “Automatic network selection” on OFF, then click on ‘Search for Networks’: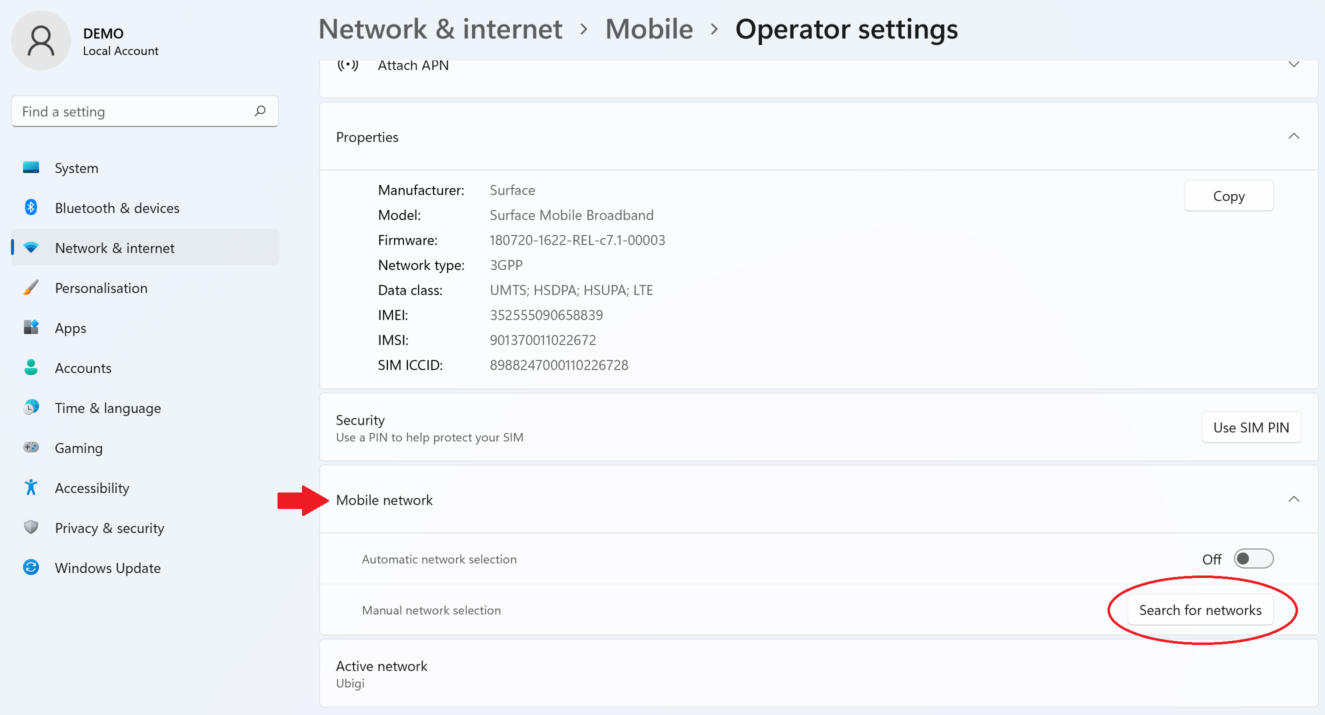
– After a few seconds, a list of available networks will be displayed. Select Ubigi (or the name of our telecom partner in the country you are located) and click OK: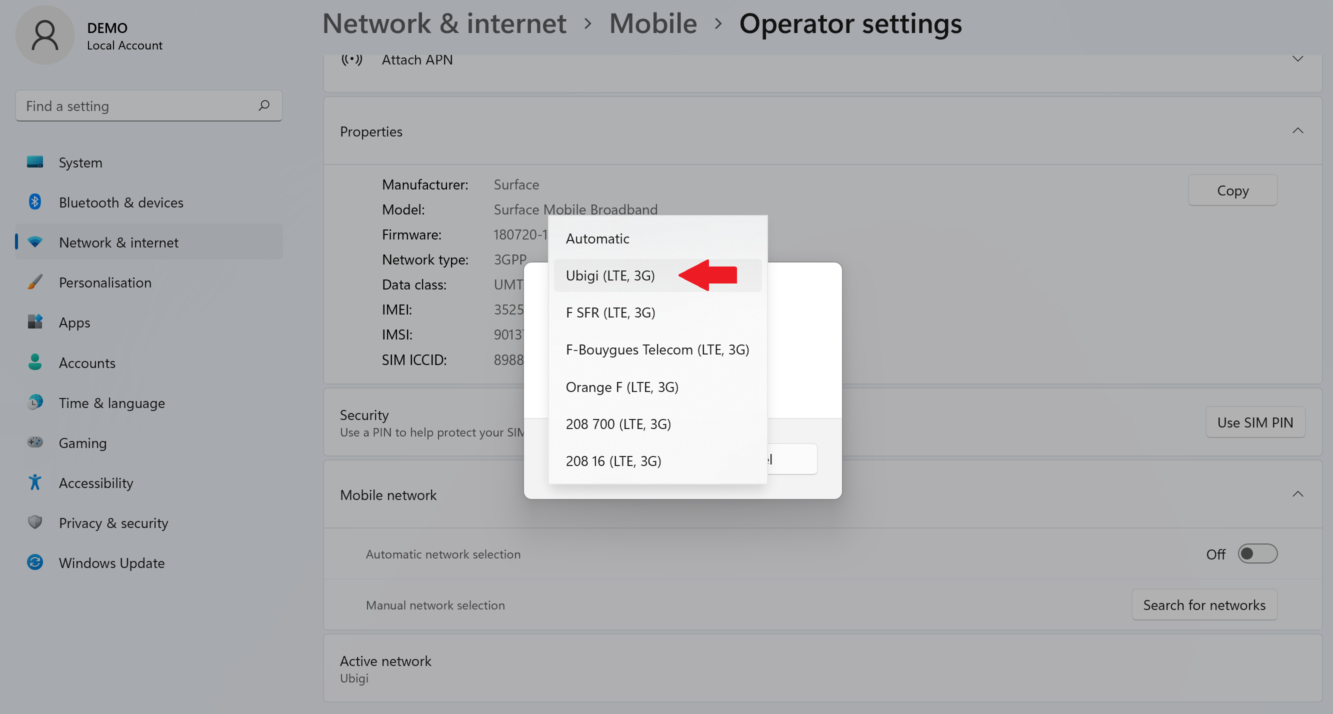
– After that, disable the Cellular option for a few seconds and reactivate it to refresh the network attachment:
After few seconds, the network will be displayed and you will be able to use your Ubigi connectivity from your device.
Note: If you are using a VPN on your device, it is recommended that you disable it in case you are having trouble connecting to Ubigi services.

