You can now purchase a data plan by 1) Connecting to your account from Ubigi.me or 2) By accessing your account from the network bar:
1/ From Ubigi.me by using a browser:
– Open a browser on your Windows 10 or Windows 11 device and go to Ubigi.me
– Enter your login and password to connect to your account
– Once connected, go to the Top-up tab and select the data plan you want to purchase
– Follow the instructions on screen to complete your purchase
2/ From the network bar of your Windows 10 or Windows 11 device:
>> You can watch the last section of our video tutorial, section “Managing your Ubigi account on Windows 10 or Windows 11” from time lap 1:20 to 1:49
>> Or follow the instructions below:
If you are using Ubigi services on your laptop/tablet equipped with a Ubigi eSIM/SIM card, first make sure that you are connected to the cellular/mobile data network with your device:
– First, deactivate WiFi option and activate “Mobile” (or “Cellular”) option in the networks bar to connect to the mobile data network with your device:
Windows 10: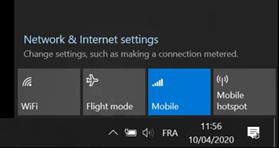
Windows 11: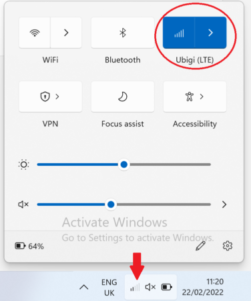
– Click on the Connect button that will appear, and you will see Ubigi appear as “Connected” at the top of the network bar (even if you have no credit left on your account):
Windows 10: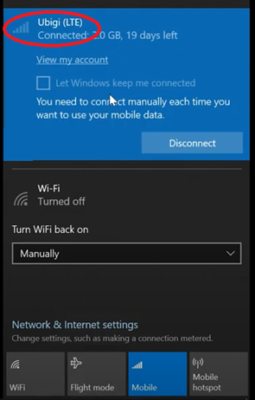
Windows 11: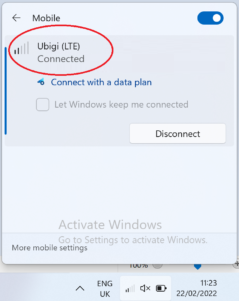
– Display your network bar and click on “View my account” or “connect with a data plan” at the top:
Windows 10: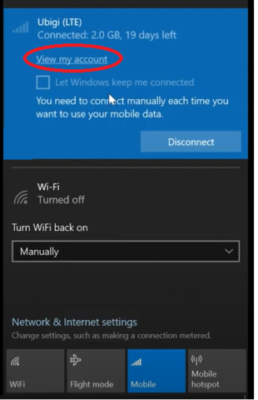
Windows 11: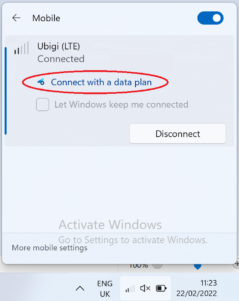
– Then on the displayed page, click on “Get a data plan”:
– Then, click on “Log in”: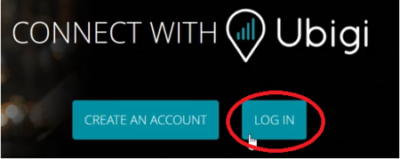
– You will be automatically redirected to your Ubigi account
– Go to the Top-up tab and select the data plan you want to purchase
– Follow the instructions on screen to complete your purchase

